Bench Press More: Tips and Techniques for Success

The bench press is a staple strength training exercise that targets the chest, shoulders, and triceps. Whether you’re a seasoned lifter or beginner, increasing your bench press can significantly enhance your overall strength and physique. Below are some effective tips and techniques to help you bench press more.

1. Master Your Form

In order to maximize strength and reduce the chance of injury, proper form is essential. Here’s how to achieve good form:

  • Feet Placement: Maintain your feet flat on the floor to provide stability. Avoid lifting your feet or resting them on the bench.
  • Back Position: Maintain a slight arch in your lower back while keeping your shoulder blades retracted and pressed into the bench. This helps engage your chest muscles.
  • Grip Width: A grip just outside shoulder-width is typically ideal. Adjust as necessary based on comfort and shoulder mobility.
  • Bar Path: Lower the bar to your mid-chest and press it back up in a straight line. Avoid flaring your elbows out too much.

2. Build a Strong Foundation

A strong bench press starts with a solid base. Incorporate these exercises into your routine to strengthen your foundation:

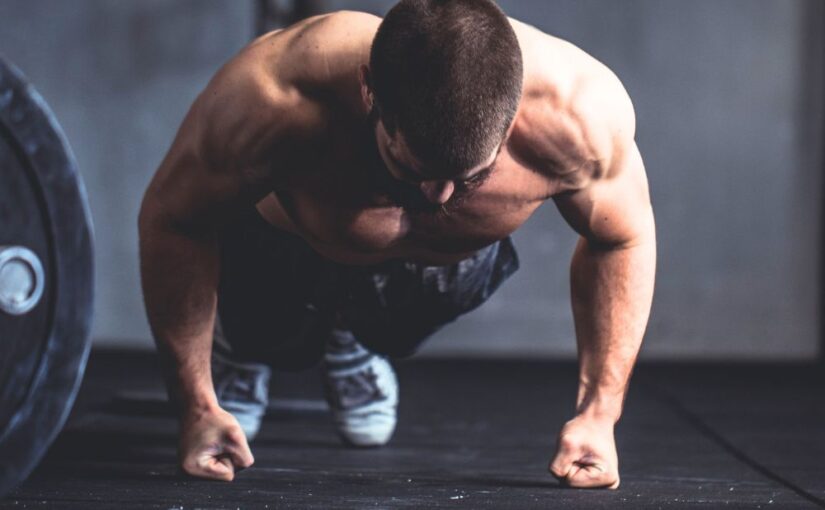
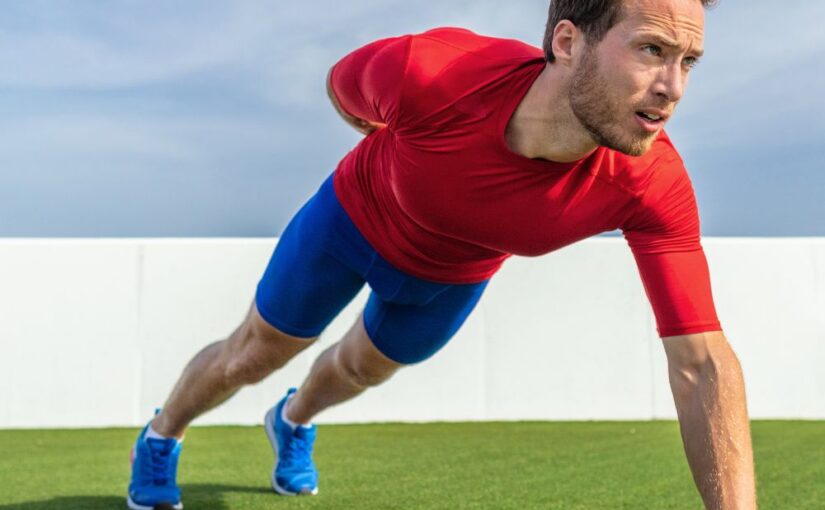
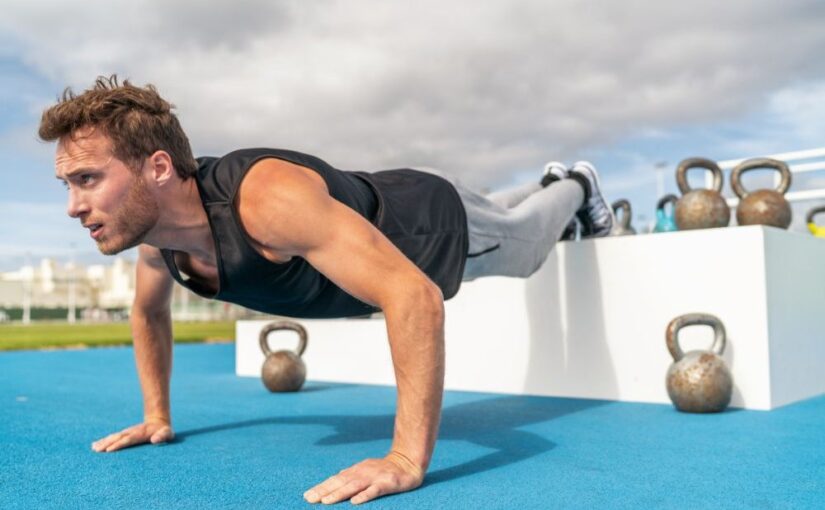
  • Push-Ups: Great for building chest and triceps strength.
  • Dumbbell Bench Press: Helps improve stability and muscle balance.
  • Incline Bench Press: Hits the upper chest and shoulders.
  • Overhead Press: Builds shoulder strength, which supports your bench press.

3. Increase Your Training Volume

To build strength, you need to increase your training volume progressively. Here’s how:

  • Frequency: Aim to bench press 1-2 times per week, allowing adequate recovery between sessions.
  • Sets and Reps: Focus on 3-5 sets of 5-8 reps at 70-85% of your one-rep max (1RM) for strength building. Gradually increase the weight as you become stronger.

4. Incorporate Accessory Exercises

Accessory exercises help strengthen supporting muscle groups, contributing to a stronger bench press. Consider adding:

  • Tricep Dips: Target the triceps, which play a significant role in the lockout phase of the bench press.
  • Chest Flyes: Enhance chest activation and stretch.
  • Face Pulls: Strengthen the rear deltoids and upper back, which improve shoulder stability.

5. Utilize Proper Breathing Techniques

Breathing correctly during the bench press can enhance your performance:

  • Inhale: Take a deep breath before lowering the bar, bracing your core for stability.
  • Exhale: Breathe out forcefully as you press the bar back up, helping to maintain tension and control.

6. Implement Progressive Overload

In order to continue making gains, you must challenge your muscles consistently:

  • Increase Weight: Gradually add weight to the bar each week, even if it’s just a small increment (e.g., 2.5 to 5 lbs).
  • Adjust Reps and Sets: Manipulate your rep ranges and set numbers to prevent plateaus.

7. Prioritize Recovery

Recovery is essential for muscle growth and strength gains:

  • Rest Days: Ensure you have adequate rest days between bench press workouts to allow muscle recovery.
  • Nutrition: Focus on a protein-rich diet to support muscle repair and growth. Strive for lean proteins, healthy fats, and complex carbohydrates.
  • Sleep: Try getting 7-9 hours of quality sleep each night to promote recovery and hormonal balance.

8. Consider Using Variations

Adding variations to your bench press routine can help stimulate growth:

  • Paused Bench Press: Pause at the bottom of the movement for a second to improve strength in the bottom position.
  • Floor Press: Limits the range of motion and targets triceps strength.
  • Close-Grip Bench Press: Focuses on triceps development and can enhance lockout strength.

Conclusion

Increasing your bench press requires a combination of proper technique, consistent training, and effective recovery strategies. By focusing on form, building a strong foundation, and incorporating progressive overload, you’ll be on your way to bench pressing more weight and achieving your strength goals. Remember to be patient; strength gains take time and dedication.

Kettlebells for Seniors: Benefits and Considerations

As we age, maintaining strength, flexibility, and balance becomes increasingly important for overall health and quality of life. Many seniors are turning to kettlebells as a viable option for strength training. But are kettlebells really suitable for older adults? Let’s explore the benefits, considerations, and guidelines for seniors using kettlebells, along with a sample exercise routine.


Benefits of Kettlebell Training for Seniors

1. Improved Strength

Kettlebells engage multiple muscle groups, helping seniors build overall strength. Exercises like swings, deadlifts, and presses enhance functional strength, making daily activities easier.

2. Enhanced Balance and Coordination

Kettlebell training requires stability and control, improving balance and coordination. This is particularly beneficial for seniors, as it helps reduce the risk of falls.

3. Increased Flexibility

Many kettlebell exercises involve a range of motion that promotes flexibility, contributing to better mobility and joint health.

4. Cardiovascular Benefits

Kettlebell workouts can elevate heart rate, providing a cardiovascular component to strength training, which helps maintain heart health and overall fitness.

5. Convenience

Kettlebells are compact and can be used at home or in the gym, allowing seniors to incorporate strength training into their routine without needing extensive equipment.

6. Adaptability

Kettlebells come in various weights, enabling seniors to start with lighter options and progress as their strength increases. Many exercises can also be modified to suit individual fitness levels.


Considerations for Seniors Using Kettlebells

1. Consulting a Professional

Before starting any new exercise program, seniors should consult with a healthcare provider or fitness professional, especially if they have existing health conditions or injuries.

2. Focus on Form

Proper technique is crucial to avoid injuries. Seniors may benefit from working with a certified trainer who can guide them in mastering kettlebell movements.

3. Start Slow

Beginners should start with lighter weights and simpler exercises to build confidence and ensure they are comfortable with the movements before progressing to more complex routines.

4. Listen to Your Body

It’s essential for seniors to pay attention to how their bodies respond to kettlebell training. Any discomfort or pain should be addressed immediately, and modifications should be made as necessary.

5. Incorporate Rest

Adequate rest days are important for recovery, especially for older adults. A balanced routine should include rest to prevent overuse injuries.


Sample Kettlebell Exercise Routine for Seniors

This routine can be performed 2-3 times a week, allowing a day of rest between sessions. Always start with a light warm-up to ready your muscles.

Warm-Up (5-10 minutes):

  • March in place or walk briskly
  • Arm circles
  • Gentle torso twists

Kettlebell Routine:

1. Kettlebell Deadlifts

  • Sets: 2-3
  • Reps: 10-12
  • Stand with feet hip-width apart and kettlebell between your feet. Bend at the hips and knees, keeping your back straight, to grasp the kettlebell. Stand up, squeezing your glutes at the top.

2. Kettlebell Goblet Squats

  • Sets: 2-3
  • Reps: 10-12
  • Sustain the kettlebell close to your chest with both hands. Squat down while maintaining your back straight and chest up. Rise back to standing.

3. Kettlebell Rows

  • Sets: 2-3
  • Reps: 10-12 per arm
  • Bend slightly at the hips with a kettlebell in one hand. Pull the kettlebell toward your waist, keeping your elbow close to your body. Switch arms after completing the set.

4. Kettlebell Swings

  • Sets: 2-3
  • Reps: 8-10
  • Stand with feet spaced shoulder-width apart and kettlebell in both hands. Hinge at the hips to lower your body, then swing the kettlebell between your legs. Use your hips to propel it forward to shoulder level.

5. Kettlebell Presses

  • Sets: 2-3
  • Reps: 8-10 per arm
  • Keep the kettlebell at shoulder height with one hand. Press it overhead, extending your arm fully. Lower it back to shoulder height and switch arms.

Cool Down (5-10 minutes):

  • Stretching exercises focusing on major muscle groups
  • Deep breathing to relax and lower heart rate

Conclusion

Kettlebells can be an excellent addition to a senior’s fitness routine, offering numerous benefits such as improved strength, balance, and flexibility. With proper guidance, technique, and a focus on safety, seniors can safely enjoy the advantages of kettlebell training. By incorporating kettlebells into their routine and following a well-structured exercise plan, seniors can enhance their overall health and well-being, contributing to a more active and fulfilling lifestyle.health and well-being, contributing to a more active and fulfilling lifestyle.

Kettlebells vs. Dumbbells: A Comparison Guide

When it comes to strength training, kettlebells and dumbbells are two of the most popular tools available. Both have their unique benefits and applications, but which is better? Let’s break down their differences, advantages, and potential drawbacks to help you determine which might be the right fit for your fitness routine.

Design and Functionality

Kettlebells: With their distinct shape—round weights with a handle—kettlebells are designed for dynamic movements that engage multiple muscle groups. Their center of mass is located outside the grip, allowing for unique swinging and rotational exercises.

Dumbbells: Traditional dumbbells consist of a straight bar with weights on either end. They are typically used for isolated movements, making them ideal for targeting specific muscles.

Benefits of Kettlebells

  1. Dynamic Movements: Kettlebells excel in exercises that require momentum, such as swings and snatches. These movements can improve explosive power and cardiovascular conditioning.
  2. Full-Body Engagement: Many kettlebell exercises activate multiple muscle groups simultaneously, providing a more comprehensive workout in less time.
  3. Functional Training: Kettlebell workouts often mimic real-life activities, enhancing functional strength and stability, which can help with everyday tasks and sports performance.
  4. Core Activation: The unique design of kettlebells promotes core engagement, aiding in stability and posture.

Benefits of Dumbbells

  1. Versatility: Dumbbells can be used for a wide range of exercises, from isolated lifts to compound movements, making them adaptable for various training goals.
  2. Stability: The symmetrical design of dumbbells allows for more controlled movements, making them suitable for beginners or those focusing on form.
  3. Targeted Training: Dumbbells are excellent for isolating specific muscles, such as biceps, triceps, or shoulders, which is beneficial for bodybuilding and rehabilitation.
  4. Easier Progression: It’s generally easier to incrementally increase weights with dumbbells, allowing for smoother progression in strength training.

Considerations for Choosing Between Kettlebells and Dumbbells

  1. Training Goals: If your primary goal is to build functional strength and improve overall fitness, kettlebells might be more beneficial. If you’re focusing on muscle isolation or bodybuilding, dumbbells could be the better choice.
  2. Experience Level: Beginners may find dumbbells easier to master due to their stability. Kettlebells require more coordination and technique, which can be challenging at first.
  3. Workout Space: Kettlebells often require less space for dynamic movements, making them a good option for home workouts. Dumbbells, while versatile, may require more room for certain exercises.
  4. Injury History: Those with prior injuries should consider how each tool affects their specific needs. Dumbbells might allow for safer, more controlled movements, while kettlebells can enhance overall stability and strength.

Conclusion

Both kettlebells and dumbbells have their own advantages and can be highly effective for strength training. The choice ultimately depends on your fitness goals, experience level, and personal preferences. Incorporating both tools into your routine can offer a well-rounded approach, leveraging the strengths of each to maximize your workouts. Whether you prefer the dynamic movements of kettlebells or the versatility of dumbbells, the key is to choose what aligns best with your training objectives.

Are Kettlebells Effective? A Complete Overview

Kettlebells have become quite popular in recent years as a versatile tool for strength training, cardiovascular conditioning, and functional fitness. But the question remains: are kettlebells truly effective? Let’s explore their benefits, versatility, and potential drawbacks.

What Are Kettlebells?

Kettlebells are cast iron weights that resemble cannonballs with handles.They come in various weights and sizes, allowing users to select the appropriate weight for their fitness level and goals. The unique design encourages a range of dynamic movements that engage multiple muscle groups.

Benefits of Kettlebell Training

  1. Full-Body Workout: Kettlebell exercises often involve multiple joints and muscle groups. Movements like swings, snatches, and cleans engage the legs, core, back, and shoulders, providing a comprehensive workout in a short time.
  2. Improved Strength and Power: The dynamic nature of kettlebell training enhances explosive power and strength. This is particularly beneficial for athletes and those looking to improve their performance in sports.
  3. Enhanced Cardiovascular Fitness: Kettlebell workouts can increase your heart rate, providing an effective cardiovascular workout alongside strength training. High-intensity kettlebell routines can burn significant calories, making them excellent for weight loss.
  4. Functional Training: Kettlebell movements mimic real-life activities, improving overall functional strength and stability. This can be particularly beneficial for daily tasks, sports performance, and injury prevention.
  5. Core Stability: Many kettlebell exercises require core engagement to maintain balance and control. This not only strengthens the core but also improves overall stability and posture.
  6. Versatility: Kettlebells can be used for a wide variety of exercises, including swings, squats, presses, and Turkish get-ups. This versatility allows for varied workout routines, helping to prevent boredom and maintain motivation.
  7. Time-Efficiency: Kettlebell workouts can be completed in a relatively short amount of time, making them ideal for busy individuals. A full-body kettlebell session can often be accomplished in 20-30 minutes.

Considerations and Potential Drawbacks

While kettlebells offer numerous benefits, there are some considerations to keep in mind:

  1. Learning Curve: Proper form is crucial to prevent injury. Beginners may need guidance to master kettlebell techniques, as improper use can lead to strains or injuries.
  2. Equipment Limitations: While one kettlebell can be sufficient for a range of exercises, to progress effectively, you may eventually need a set of different weights, which can be an investment.
  3. Not a Complete Solution: Kettlebell training can be a fantastic addition to a fitness regimen but should not be the sole component. A well-rounded program typically includes other forms of training, such as bodyweight exercises, resistance training, and cardiovascular activities.
  4. Potential for Overtraining: As with any type of exercise, excessive kettlebell training without adequate rest can lead to injuries related to overuse. It’s important to pay attention to your body and include rest days in your routine.

Conclusion

Kettlebells are indeed effective for building strength, enhancing cardiovascular fitness, and improving overall functionality. Their versatility and time efficiency make them appealing for a wide range of fitness enthusiasts, from beginners to seasoned athletes. However, like any workout tool, they should be used with proper form and technique, and as part of a balanced fitness program.

Whether you’re looking to build muscle, lose weight, or improve athletic performance, incorporating kettlebells into your routine can be a powerful and enjoyable way to achieve your fitness goals.

Traps Workout at Home: No Equipment Needed for Strength

Building strong trapezius muscles, or “traps,” not only enhances your physique but also improves posture and shoulder stability. Fortunately, you can effectively target your traps at home without any equipment. Here’s a guide to help you strengthen your traps with simple bodyweight exercises.

Understanding the Trapezius Muscle

The trapezius muscle extends across the upper back and neck and consists of three main parts:

  1. Upper Traps: Responsible for shrugging the shoulders and supporting neck movements.
  2. Middle Traps: Involved in retracting the shoulder blades.
  3. Lower Traps: Aids in stabilizing the shoulder blades and assists in shoulder movements.

Focusing on all three areas will lead to a well-rounded development of your traps.

Effective Traps Exercises

1. Shoulder Shrugs

How to do it:

  • Stand with your feet shoulder-width apart and arms at your sides.
  • Raise your shoulders towards your ears as high as possible.
  • Hold for a moment, then lower back down.

Reps: 15-20 times, 3 sets

2. Reverse Plank

How to do it:

  • Sit on the floor with your legs extended in front of you and hands behind your hips.
  • Press into your hands and raise your hips, forming a straight line from your head to your heels.
  • Hold this position while engaging your traps.

Duration: 20-30 seconds, 3 sets

3. Y-T-W-L Raises

How to do it:

  • Lie face down on the floor with your arms extended above your head (Y position).
  • Raise your arms off the ground and squeeze your shoulder blades together.
  • Raise your arms to a T position, then move them to a W position, and finally to an L position with your elbows bent at 90 degrees.

Reps: 8-10 times for each position, 3 sets

4. Plank to Downward Dog

How to do it:

  • Begin in a plank position with your hands placed directly beneath your shoulders.
  • Push your hips up and back into a downward dog position, trying to lengthen your spine and press your chest toward your thighs.
  • Return to the plank position.

Reps: 10-15 times, 3 sets

5. Neck Extensions

How to do it:

  • Stand or sit with your back straight.
  • Slowly tilt your head backward while looking up at the ceiling.
  • Sustain for a moment and return to the starting position.

Reps: 10-15 times, 3 sets

Additional Tips for Traps Training

  • Maintain Proper Form: Focus on technique over quantity to prevent injury and ensure effectiveness.
  • Progress Gradually: Increase the number of reps or sets as your strength improves.
  • Stay Consistent: Aim to train your traps 2-3 times a week for the best results.

Nutrition and Recovery

To support muscle growth, maintain a balanced diet rich in protein, healthy fats, and carbohydrates. Ensure adequate hydration and allow your muscles time to recover between workouts to maximize gains.

Conclusion

Strengthening your traps at home without equipment is entirely achievable with dedication and the right exercises. By incorporating these movements into your routine, you’ll develop stronger, more defined traps that enhance your overall strength and posture. Start today and enjoy the benefits of a well-rounded upper body workout!

Effective Tips to Build Bigger Forearms at Home

Building bigger forearms can enhance your grip strength, improve your overall athletic performance, and create a more balanced physique. Fortunately, you don’t need a gym to achieve this. Here’s how to effectively train your forearms at home.

Understanding Forearm Anatomy

The forearm consists of several key muscle groups, including:

  • Flexor muscles: Located on the inner side, responsible for wrist flexion.
  • Extensor muscles: Found on the outer side, responsible for wrist extension.
  • Brachioradialis: Runs along the outer forearm, playing a key role in elbow flexion.

Targeting these muscles with specific exercises will help you build mass and strength.

Effective Forearm Exercises

1. Wrist Curls

How to do it:

  • Sit on a chair with your forearms resting on your thighs with palms facing up.
  • Hold a weight (like a water bottle or a bag of rice) in each hand.
  • Curl your wrists up, then slowly lower them back down.

Reps: 10-15 times, 3 sets

2. Reverse Wrist Curls

How to do it:

  • Similar setup as wrist curls, but with palms facing down.
  • Curl your wrists upward, engaging the extensor muscles.

Reps: 10-15 times, 3 sets

3. Farmer’s Walk

How to do it:

  • Grab two heavy objects (like bags or water jugs) and hold them at your sides.
  • Walk around your space for 30-60 seconds, focusing on grip strength.

Sets: 3-4 times

4. Towel Twist

How to do it:

  • Take a towel and twist it as if you are wringing out water.
  • Hold one end of the towel with both hands and twist in opposite directions.

Duration: 30 seconds, 3 sets

5. Push-Ups

How to do it:

  • Standard push-ups not only work your chest and arms but also engage your forearms.
  • Focus on maintaining a strong grip as you lower and raise your body.

Reps: 10-20 times, 3 sets

Additional Tips for Forearm Training

  • Consistency: Aim to train your forearms 2-3 times a week for optimal results.
  • Increase Resistance: As you get stronger, increase the weight or duration of your exercises.
  • Combine with Full-Body Workouts: Incorporating forearm exercises into a full-body routine can enhance overall strength.

Nutrition and Recovery

To support muscle growth, prioritize a balanced diet rich in protein, healthy fats, and carbohydrates. Stay hydrated and ensure adequate recovery time between workouts to prevent overtraining.

Conclusion

Building bigger forearms at home is achievable with dedication and the right exercises. By consistently incorporating targeted workouts and focusing on proper nutrition, you can develop impressive forearms that enhance both your strength and appearance. Start today and enjoy the results of your hard work!

Build Neck Muscles at Home Without Equipment: Effective Tips

Building neck muscles at home without equipment may seem challenging, but it’s entirely possible with the right exercises and dedication. A strong neck not only enhances your appearance, but also improves posture, reduces the risk of injuries, and can enhance athletic performance. Here’s a guide to help you strengthen your neck muscles effectively.

Understanding Neck Anatomy

Before diving into exercises, it’s important to understand the anatomy of the neck. The neck consists of several muscles, including:

  • Sternocleidomastoid: Located at the front, responsible for rotating and flexing the head.
  • Trapezius: Covers the upper back and neck, supporting head movement and stability.
  • Levator Scapulae: Helps elevate the shoulder blades and supports neck movement.

Strengthening these muscles will contribute to overall neck health and functionality.

Key Exercises for Neck Muscles

1. Neck Flexion

How to do it:

  • Sit or stand upright with your back straight.
  • Slowly lower your chin to your chest, feeling the stretch in the back of your neck.
  • Sustain for a moment, then return to the starting position.

Reps: 10-15 times

2. Neck Extension

How to do it:

  • Begin in the same upright position.
  • Tilt your head back slowly while looking at the ceiling.
  • Sustain for a few seconds before returning to the starting position.

Reps: 10-15 times

3. Lateral Neck Flexion

How to do it:

  • Stand or sit straight.
  • Tilt your head towards your right shoulder, bringing your ear close to it.
  • Hold the stretch, then return to the center and repeat on the left side.

Reps: 10-15 times per side

4. Neck Rotation

How to do it:

  • Sit or stand with a straight posture.
  • Slowly turn your head to the right while looking behind your shoulder.
  • Hold, then return to the center and repeat on the left side.

Reps: 10-15 times per side

5. Isometric Neck Exercises

How to do it:

  • Place your palm against your forehead. Press your head against your hand while resisting the movement with your hand. Hold for 5-10 seconds.
  • Repeat with your hand placed at the back of your head, and then on each side.

Reps: 5-10 times in each position

Tips for Effective Neck Training

  • Warm-Up: Always begin with a warm-up to prepare your muscles. Gentle neck rolls and stretches can be effective.
  • Focus on Form: Proper form is vital to avoid strain. Move slowly and control your movements.
  • Consistency is Key: Aim to incorporate these exercises into your routine 2-3 times per week for best results.
  • Progress Gradually: As you get stronger, increase the number of reps or sets to continue challenging your muscles.

Additional Considerations

  • Listen to Your Body: If you feel any pain or discomfort, stop the exercise and reassess your form or consult a professional.
  • Combine with Overall Fitness: To enhance your neck strength and muscle definition, incorporate a full-body workout routine, including cardiovascular and strength training exercises.
  • Hydration and Nutrition: Adequate hydration and a balanced diet rich in protein will support muscle recovery and growth.

Conclusion

Building neck muscles at home without equipment is not only feasible, but can also be quite effective with the right approach. By incorporating these exercises into your routine and being consistent, you can strengthen your neck, improve posture, and enhance your overall fitness. Remember to listen to your body and progress at your own pace for the best results.

Build Triceps at Home: Effective Exercises & Tips Guide

Building strong triceps is essential for overall arm strength and aesthetics. Whether you’re looking to enhance your upper body appearance or improve your performance in other exercises, training your triceps effectively at home is entirely achievable. Here’s how you can do it.

Understanding the Triceps

The triceps brachii, commonly referred to as the triceps, is a muscle located at the back of the upper arm. It consists of three heads: the long head, the lateral head, and the medial head. Targeting all three heads is essential for balanced development.

Essential Equipment

While you can build triceps with just your body weight, having a few items can enhance your workouts:

  1. Dumbbells: Versatile and effective for a variety of exercises.
  2. Resistance Bands: Great for added resistance without the need for weights.
  3. Chair or Bench: Useful for bodyweight exercises and dips.
  4. Stability Ball: Can help with some variations of tricep exercises.

Effective Tricep Exercises

1. Push-Ups

  • How to Do It: Start in a plank position. Lower your body and keep your elbows close to your sides. Push back up to the starting position.
  • Modification: To place greater emphasis on your triceps, consider doing diamond push-ups with your hands positioned closely together.

2. Tricep Dips

  • How to Do It: Use a sturdy chair or bench. Sit on the edge, place your hands next to your hips, and slide your buttocks off. Bend your elbows to slowly lower your body and then push back up..
  • Tip: Keep your elbows pointed backward to focus on the triceps.

3. Overhead Dumbbell Extensions

  • How to Do It: Stand or sit with a dumbbell in both hands. Extend your arms overhead and slowly lower the dumbbell behind your head by bending your elbows. Raise it back to the starting position.
  • Tip: Keep your elbows close to your head for maximum engagement.

4. Tricep Kickbacks

  • How to Do It: Bend at the waist with a dumbbell in each hand. Keep your elbows at a 90-degree angle, then extend your arms back, squeezing the triceps.
  • Tip: Avoid swinging your arms; focus on a controlled movement.

5. Skull Crushers

  • How to Do It: Lie on your back on a bench or the floor, with dumbbells above your chest. Bend your elbows to lower the weights toward your forehead, then extend back to the starting position.
  • Tip: Use lighter weights initially to master the form and avoid injury.

6. Resistance Band Tricep Pushdowns

  • How to Do It: Anchor a resistance band overhead. Grasp the band with both hands, elbows at your sides, and push down until your arms are fully extended.
  • Tip: Control the band on the way back to maximize tension on the triceps.

Workout Structure

Frequency

Aim to train your triceps 2-3 times a week, allowing for recovery time between sessions.

Sets and Reps

  • Beginners: Start with 2-3 sets of 8-12 reps for each exercise.
  • Intermediate/Advanced: Increase to 3-4 sets of 10-15 reps, incorporating heavier weights or additional resistance as you progress.

Sample Tricep Workout

  1. Push-Ups: 3 sets of 10-12 reps
  2. Tricep Dips: 3 sets of 8-10 reps
  3. Overhead Dumbbell Extensions: 3 sets of 10-12 reps
  4. Tricep Kickbacks: 3 sets of 10-15 reps
  5. Skull Crushers: 3 sets of 8-10 reps

Tips for Success

  • Warm Up: Always begin with a warm-up to prevent injury. Dynamic stretches and light cardio are effective.
  • Focus on Form: Proper technique is crucial. Poor form may lead to injury and ineffective workouts.
  • Progressive Overload: To keep your muscles challenged, gradually increase the weight or resistance.
  • Nutrition: Make sure you’re taking in enough protein to support muscle growth and recovery.
  • Hydration: Keep hydrated before, during, and after your workouts.

Conclusion

Building strong triceps at home is entirely feasible with dedication and the right exercises. By incorporating a variety of movements targeting all three heads of the triceps, you’ll not only enhance the appearance of your arms, but also improve your overall upper body strength. Stay consistent, focus on form, and watch your triceps grow!

Build Biceps at Home with Dumbbells: Tips and Exercises

Building strong, defined biceps can enhance your overall physique and improve your upper body strength. Dumbbells are an excellent tool for targeting the biceps, and they offer versatility for a variety of exercises. This article will outline effective dumbbell exercises, a sample routine, and tips for maximizing your bicep gains at home.

Understanding the Biceps

The biceps brachii is composed of two heads: the long head and the short head. To effectively develop this muscle, it’s important to incorporate exercises that target both heads, promoting balanced growth and definition.

Essential Dumbbell Exercises for Biceps

Here are some key exercises you can do at home with dumbbells to build your biceps:

1. Dumbbell Bicep Curl

  • How to Do It: How to Do It: Stand or sit with a dumbbell in each hand and arms fully extended at your sides. Curl the weights up towards your shoulders while keeping your elbows close to your torso. Contract at the top, then lower back to the starting position.
  • Reps: 3 sets of 10-15 reps

2. Hammer Curl

  • How to Do It: Hold a dumbbell in each hand with your palms facing your body (neutral grip). Curl the weights towards your shoulders while maintaining your elbows tucked. This variation targets both the biceps and the forearms.
  • Reps: 3 sets of 10-15 reps

3. Concentration Curl

  • How to Do It: While sitting, grasp a dumbbell in one hand. Support your elbow against the inner part of your thigh. Curl the weight up to your shoulder, contract the bicep. Switch arms after completing the reps.
  • Reps: 3 sets of 10-12 reps per arm

4. Incline Dumbbell Curl

  • How to Do It: Set an incline bench at approximately 45 degrees. Sit back with a dumbbell in each hand, letting your arms hang straight down. Curl the weights up while keeping your elbows stationary, targeting the long head of the biceps.
  • Reps: 3 sets of 10-12 reps

5. Zottman Curl

  • How to Do It: Stand or sit with a dumbbell in each hand. Perform a regular bicep curl, but at the top, rotate your wrists so your palms face down. Lower the weights in this position, then rotate back to the starting position at the bottom.
  • Reps: 3 sets of 10-12 reps

Sample Dumbbell Bicep Workout Routine

Routine Overview

Frequency: Perform this workout 2-3 times a week, allowing at least 48 hours of rest between sessions.

  1. Warm-Up: 5-10 minutes of dynamic stretches (arm circles, shoulder rolls)
  2. Dumbbell Bicep Curl: 3 sets of 10-15 reps
  3. Hammer Curl: 3 sets of 10-15 reps
  4. Concentration Curl: 3 sets of 10-12 reps (per arm)
  5. Incline Dumbbell Curl: 3 sets of 10-12 reps
  6. Zottman Curl: 3 sets of 10-12 reps
  7. Cool Down: 5-10 minutes of stretching focusing on the arms and shoulders

Tips for Maximizing Bicep Gains

  • Focus on Form: Proper technique is crucial. Avoid swinging the weights or using momentum; instead, control the movement throughout each rep.
  • Vary Your Routine: Change your exercises or the order of your workouts every few weeks to prevent plateaus.
  • Progressive Overload: Gradually increase the weight or the number of reps to continue challenging your muscles.
  • Rest and Recovery: Allow your biceps adequate time to recover. Muscles grow during rest, not during workouts.

Conclusion

Building biceps at home with dumbbells is effective and straightforward. By incorporating a variety of exercises and maintaining a consistent workout routine, you can achieve impressive bicep growth. Remember to focus on form, vary your workouts, and allow for proper recovery. With dedication and effort, you’ll soon see the results you desire!

Build Big Biceps at Home: No Equipment Needed

Achieving well-defined biceps is a common goal for fitness enthusiasts. While traditional gym workouts often rely on weights and machines, you can effectively build your biceps at home using just your body weight. This article will guide you through exercises, techniques, and a sample routine to maximize your bicep gains without any equipment.

Understanding the Biceps

The biceps brachii is a muscle located at the front of your upper arm, consisting of two heads (the long head and the short head). To effectively target and grow your biceps, you’ll want to engage in exercises that emphasize both heads of the muscle.

Warm-Up

Before starting your workout, it’s essential to warm up to prevent injury and prepare your muscles. Spend 5-10 minutes performing dynamic stretches like:

  • Arm circles
  • Shoulder rolls
  • Light jogging in place

Bodyweight Exercises for Biceps

Here are some effective bodyweight exercises to build your biceps at home:

1. Push-Ups

While primarily targeting the chest and triceps, push-ups also engage the biceps as stabilizers.

  • Variation: Close-grip push-ups (hands close together) or diamond push-ups (hands in a diamond shape) increase bicep engagement.

2. Chin-Ups (Using a Bar or Door Frame)

If you have access to a pull-up bar or a sturdy door frame, chin-ups are excellent for targeting the biceps.

  • Technique: Use an underhand grip (palms facing you) and pull your chin above the bar. If you lack a bar, perform negative chin-ups by jumping up and slowly lowering yourself.

3. Isometric Bicep Hold

This exercise can be done anywhere and is effective for building muscle endurance.

  • Technique: Press your palms together in front of your chest and push against each other with maximum effort. Maintain this position for 30 seconds to a minute.

4. Bodyweight Curls

Use a sturdy table or counter for this exercise.

  • Technique: Stand a few feet from the table, grip the edge with an underhand grip, and lean back. Pull yourself toward the table by bending your elbows, mimicking a bicep curl motion.

5. Plank to Push-Up

This dynamic move engages your core and biceps.

  • Technique: Start in a plank position on your forearms. Push up onto your hands one arm at a time, then return to the plank position. Repeat for several reps.

Sample Bicep Workout Routine

Full Routine

Frequency: Aim to do this routine 2-3 times a week, allowing at least one day of rest in between.

  1. Warm-Up: 5-10 minutes of dynamic stretching
  2. Push-Ups: 3 sets of 10-15 reps (Close-grip or diamond for extra bicep focus)
  3. Chin-Ups: 3 sets of 5-10 reps (or negatives if no bar is available)
  4. Isometric Bicep Hold: 3 sets of 30-60 seconds
  5. Bodyweight Curls: 3 sets of 10-15 reps
  6. Plank to Push-Up: 3 sets of 8-12 reps
  7. Cool Down: 5-10 minutes of stretching

Incorporating Resistance

To further challenge your biceps, consider adding resistance:

  • Backpack Weights: Fill a backpack with books or heavy items and use it for resistance while performing push-ups or curls.
  • Towel Resistance: Hold a towel with both hands, pull it taut, and perform isometric curls or variations to create tension.

Cool Down and Stretch

After your workout, take time to cool down and stretch your biceps and arms. Simple stretches include:

  • Arm across the chest stretch
  • Overhead tricep and bicep stretch

Hold each stretch for 15-30 seconds to enhance flexibility and promote recovery.

Conclusion

Building big biceps at home without equipment is entirely achievable with dedication and the right exercises. By following the sample routine, incorporating bodyweight movements, and consistently challenging yourself, you can sculpt impressive biceps. Stay committed to your fitness journey, and you’ll see the results you desire!